
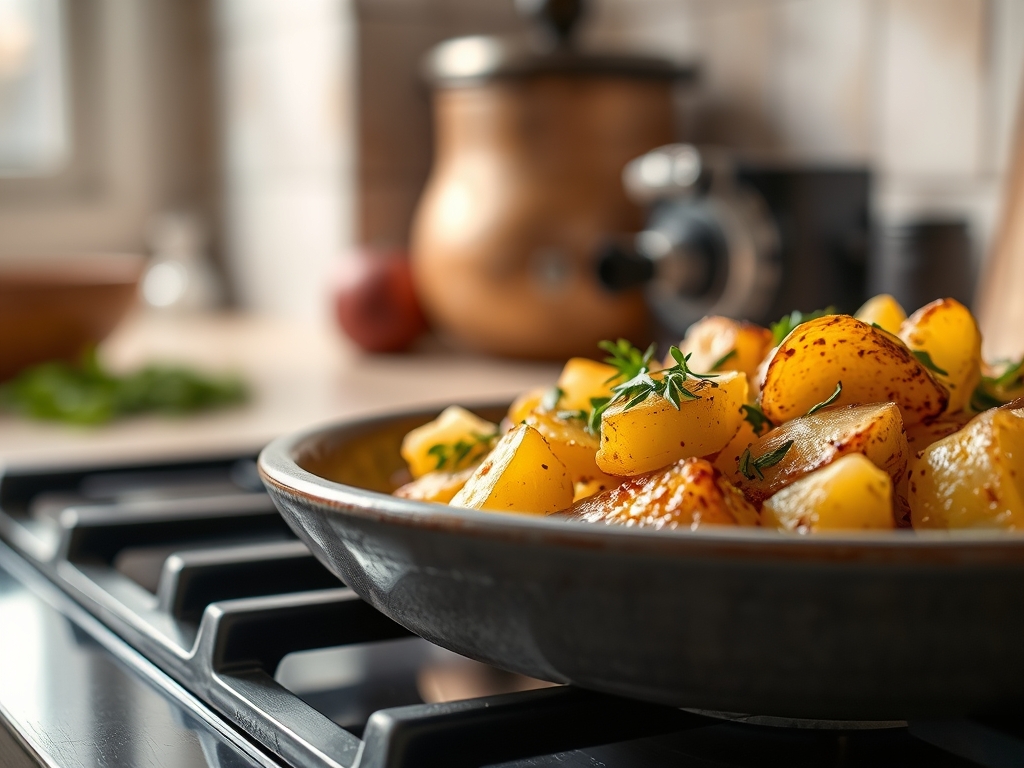
The scent of sizzling butter hitting a heavy-bottomed skillet is the universal siren song of a kitchen that knows what it is doing. We have all been there; you are craving that specific, glass-like crunch on the outside and a cloud-like interior, but the oven takes forty-five minutes just to preheat. Mastering potato recipes on stove tops is the ultimate culinary power move because it grants you total control over heat conduction and moisture evaporation in real time. This is not just about frying spuds; it is about manipulating starch molecules to achieve structural perfection without the dry heat of a convection cycle. Whether you are aiming for a silky fondant or a rustic hash, the stovetop allows for immediate adjustments that an oven simply cannot offer. We are diving deep into the chemistry of the humble tuber to ensure every bite is a masterclass in texture. Forget the soggy, unevenly cooked piles of the past. By the time we are finished, you will understand exactly how to balance surface tension and internal steam to create the most addictive side dish in your repertoire.

The Gathers:
To begin, you need a high-quality Yukon Gold or Russet potato. The Yukon Gold offers a waxy, medium-starch profile that holds its shape during agitation; whereas the Russet provides a high-starch, low-moisture cell structure that is ideal for maximum fluffiness. You will also need a fat with a high smoke point, such as clarified butter (ghee) or avocado oil, to facilitate the Maillard reaction without scorching. Fresh aromatics like rosemary, thyme, and garlic cloves are essential for an infused lipid base. Do not forget the salt; use a fine sea salt for the initial seasoning to ensure it dissolves into the surface moisture, and a flaky Maldon for the finishing touch.
Smart Substitutions: If you are looking to lower the glycemic index, swap traditional tubers for Japanese Sweet Potatoes, which offer a denser crumb and a piquant sweetness. For a dairy-free version that still mimics the richness of butter, use refined coconut oil mixed with a teaspoon of nutritional yeast to replicate that savory, nutty profile. If you lack fresh herbs, a high-quality dry Herbes de Provence can be bloomed in the oil at the start of the process to release its volatile oils.
The Clock
Efficiency in the kitchen relies on what professionals call The Chef's Flow. This is the art of overlapping tasks so that no heat is wasted. Your total active time will be approximately 10 minutes, with a total cook time of 25 minutes.
Prep Time (10 Minutes): This involves the mechanical breakdown of the potatoes. Using a bench scraper to move your uniform cubes ensures you do not dull your knife on the cutting board. This is also when you will perform a cold-water soak to remove excess surface starch.
Cook Time (25 Minutes): The first 15 minutes are dedicated to gelatinizing the starch under a lid to trap steam. The final 10 minutes are the "open-skillet" phase, where you increase the heat to render the fats and develop that golden-brown crust through direct conduction.

The Masterclass
1. The Uniform Cube
Consistency is the bedrock of even cooking. Use a sharp chef's knife to cut your potatoes into precise 1/2-inch cubes. If the sizes vary, the smaller pieces will disintegrate into a viscous paste before the larger pieces reach a palatable temperature.
Pro Tip: This prevents differential cooking rates. When pieces are uniform, the heat penetrates the center of every cube at the same velocity, ensuring a synchronized finish.
2. The Cold Water Shock
Submerge your cut potatoes in a bowl of ice-cold water for at least five minutes. You will notice the water becomes cloudy; this is the free amylose being released from the cut cells.
Pro Tip: Removing surface starch prevents the potatoes from sticking to the pan. It also allows for a crispier exterior because there is no excess starch to burn before the interior is cooked.
3. Total Surface Desiccation
After soaking, you must dry the potatoes thoroughly using a clean lint-free towel. Water is the enemy of the Maillard reaction. If the potatoes are damp, the energy from your stove will be spent evaporating that water rather than browning the vegetable.
Pro Tip: This utilizes the Latent Heat of Vaporization. By removing surface moisture manually, you allow the surface temperature to rise above 300 degrees Fahrenheit almost instantly.
4. The Heavy-Bottomed Skillet Choice
Select a cast iron or heavy stainless steel skillet. These materials have high thermal mass, meaning they do not drop in temperature when you add the cold potatoes.
Pro Tip: A heavy pan prevents "hot spots" that cause localized burning. Consistent heat distribution ensures the lipids emulsify evenly across the entire batch.
5. The Cold Start Oil Infusion
Place your fat and aromatics in the pan while it is still cool. Gradually bring the heat up to medium. This allows the fat to infuse with the essential oils of the garlic and herbs without burning them.
Pro Tip: This is known as cold-infusion. It creates a more complex flavor profile as the heat gently coaxes the fat-soluble compounds out of the aromatics.
6. The Steam Phase
Add the potatoes to the pan and cover with a tight-fitting lid for the first eight minutes. This creates a pressurized environment where the potato's own moisture turns to steam, softening the internal cellulose structure.
Pro Tip: This utilizes convection within the pan. It ensures the center is tender before the outside becomes too hard or charred.
7. The Agitation Pause
Once the lid is removed, do not touch the potatoes for at least four minutes. They need uninterrupted contact with the hot surface to develop a dehydrated pellicle, which becomes the crust.
Pro Tip: Constant stirring leads to mechanical breakdown. Leaving them still allows the sugars to caramelize through sustained conduction.
8. The Flip and Deglaze
Use a metal spatula or tongs to flip the potatoes. If any bits are stuck, add a tablespoon of water or stock to deglaze the pan. The steam will lift the caramelized bits (the fond) and coat the potatoes in flavor.
Pro Tip: This process captures the fond, which is concentrated umami. It reincorporates lost flavor back into the primary ingredient.
9. The Microplane Finish
Once the potatoes are fork-tender and golden, grate a fresh clove of garlic or a dusting of Parmesan over the top using a microplane. The fine particles will melt instantly into the nooks and crannies.
Pro Tip: Using a microplane increases the surface area of the garnish, allowing for an immediate release of aroma and flavor without the bitterness of burnt garlic chunks.
10. The Carryover Rest
Remove the skillet from the heat and let the potatoes sit for two minutes before serving. This allows the internal pressure to stabilize and the crust to "set."
Pro Tip: This accounts for thermal carryover. The internal temperature will continue to rise slightly, finishing the cook perfectly without over-browning the exterior.
The Deep Dive
Macro Nutrition: Potatoes are a powerhouse of complex carbohydrates and potassium. One medium serving provides roughly 150 calories, 3 grams of protein, and zero fat (before your cooking oils). They are naturally gluten-free and provide a significant amount of Vitamin C.
Dietary Swaps: For a Keto-friendly alternative, use this exact method with Radishes or Kohlrabi. They mimic the texture of a potato but with a fraction of the net carbs. For a Vegan approach, use avocado oil and finish with smoked paprika for a meaty, savory depth.
The Fix-It:
- Problem: Potatoes are mushy. Fix: You likely crowded the pan; cook in smaller batches to allow steam to escape.
- Problem: Outside is burnt, inside is raw. Fix: Your heat is too high; use the lid-on steam method longer to soften the core.
- Problem: Potatoes are sticking. Fix: Your pan wasn't hot enough before adding the fat, or you didn't dry them enough.
Meal Prep: To reheat, avoid the microwave as it turns the starch "rubbery" through retrogradation. Instead, toss them back into a hot, dry skillet for three minutes to re-crisp the exterior.
The Wrap-Up
Mastering potato recipes on stove tops is about more than just a quick side dish; it is about understanding the delicate dance between moisture and heat. When you treat the potato with scientific respect—focusing on starch removal, uniform cutting, and thermal mass—you elevate a pantry staple into a gourmet experience. Your kitchen is now a laboratory of flavor, and those golden, crispy cubes are your successful experiment. Go forth and sizzle with confidence!
The Kitchen Table
Which potato is best for stovetop frying?
Yukon Gold potatoes are the gold standard for stovetop cooking. They possess a medium starch content that creates a creamy interior while maintaining enough structural integrity to develop a crisp, golden exterior without falling apart in the pan.
How do I stop potatoes from sticking to the pan?
Ensure the potatoes are completely dry before hitting the oil. Additionally, do not flip them too early. The potatoes will naturally release from the surface once a sufficient crust has formed through the Maillard reaction.
Can I cook stovetop potatoes without oil?
While you can use a non-stick pan with a splash of broth, you will miss out on the signature "crunch." Fats act as a heat transfer medium that allows the surface to reach temperatures high enough for browning.
Should I boil potatoes before putting them in the skillet?
Par-boiling is an optional step that can speed up the process, but the "steam-under-the-lid" method mentioned above achieves the same tender interior in one pan, saving you time and extra cleanup.
How do I keep stovetop potatoes crispy for a crowd?
Place the finished potatoes on a wire rack set over a baking sheet in a warm oven (200°F). The rack allows air to circulate, preventing the bottom from steaming and becoming soggy while you finish other dishes.