
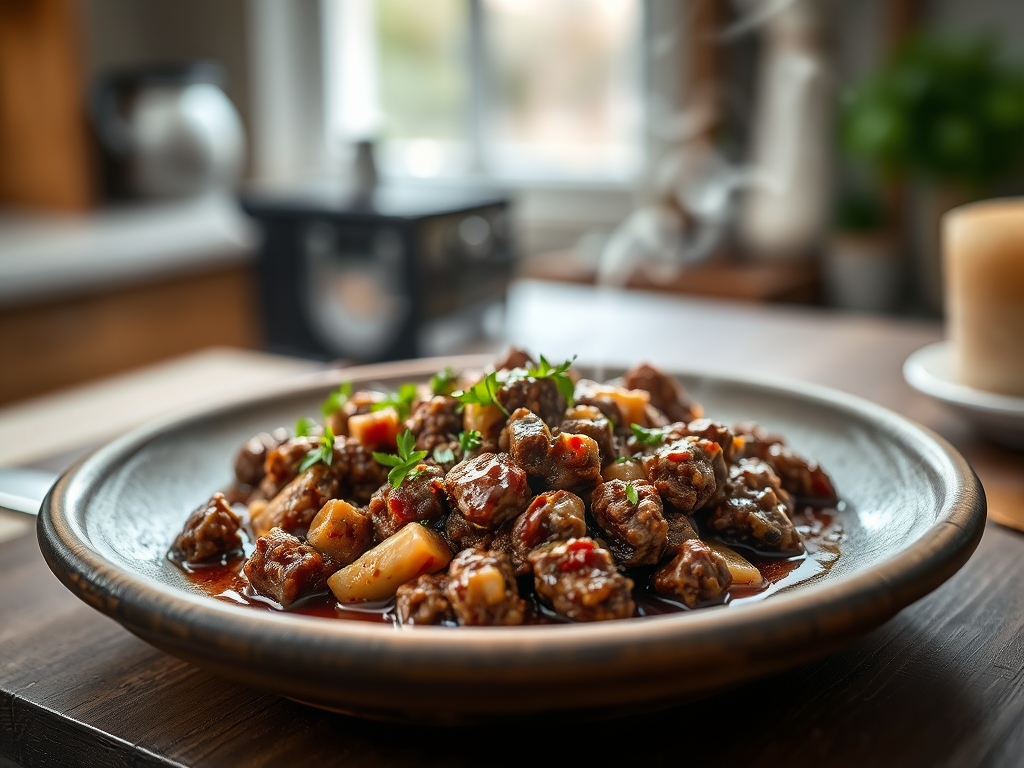
Steam rises in a fragrant, heavy cloud as you lift the cast iron lid; it is the scent of a kitchen that knows exactly what it is doing. When you dive into the world of dutch oven ground beef recipes, you are not just making dinner; you are mastering the art of the one-pot symphony. There is something deeply satisfying about the way a heavy vessel transforms humble protein into a velvety, rich masterpiece that warms the soul.
The secret to a truly elite casserole lies in the heat retention of your cookware. Because cast iron distributes thermal energy so evenly, every morsel of beef undergoes a uniform transformation. We are moving beyond basic chili and into the realm of sophisticated, layered comfort food. Think of this as your culinary roadmap to high-density flavor. Whether you are craving a piquant Tex-Mex bake or a classic French-inspired shepherd's pie, these techniques will ensure your results are never watery or bland. We are aiming for that perfect, viscous sauce that clings to every noodle and vegetable. Let us get your kitchen smelling like a five-star bistro.
The Gathers:
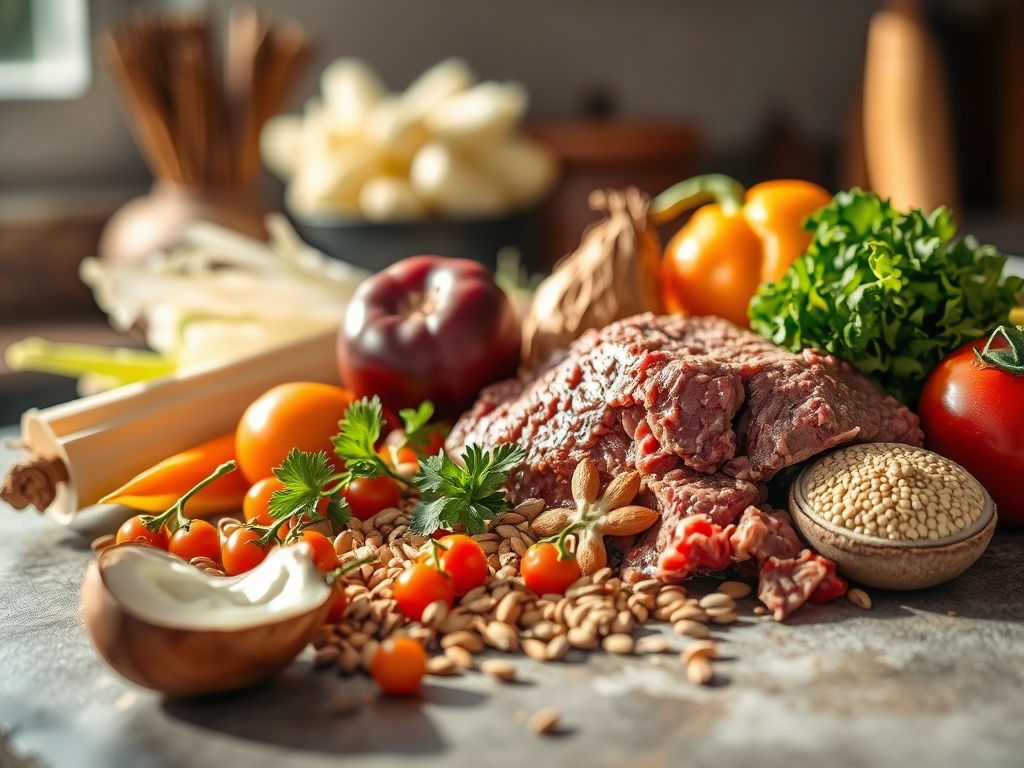
Before we ignite the burner, we must respect the mise-en-place. Your workspace should look like a laboratory of flavor. Start with high-quality ground beef; ideally a 80/20 blend. This ratio is vital because the fat will render out to create the base of our roux or sauce. You will need a sharp chef knife and a sturdy bench scraper to transport your aromatics from the cutting board to the pot without losing a single cube of onion.
Gather your aromatics: yellow onions for sweetness, celery for structure, and carrots for earthiness. Use a microplane to grate fresh garlic and ginger; this increases the surface area and allows the oils to infuse the fat more rapidly. For the liquid gold, have your beef bone broth and a dry red wine ready to deglaze the bottom of the pot.
Smart Substitutions: If you are looking to lighten the profile, ground turkey or chicken can be swapped in, but you must add a teaspoon of Worcestershire sauce to mimic the umami depth of beef. For a plant-based twist, lentils or crumbled tempeh work beautifully. If you find yourself out of wine, a splash of balsamic vinegar mixed with beef stock provides that necessary acidic brightness to cut through the richness of the fats.
The Clock:
Efficiency in the kitchen is about the Chef's Flow. This is the rhythmic sequence of tasks that ensures nothing sits idle. For these dutch oven ground beef recipes, expect a prep time of 20 minutes and a cook time ranging from 45 to 60 minutes.
The first 10 minutes are dedicated to the "Hard Sear." This is where you develop the fond. The middle 30 minutes are for the "Low and Slow" simmer, where the collagen in the meat breaks down and the flavors marry. The final 10 minutes are for the "Rest and Set." Never skip this. Allowing the casserole to sit off the heat for a few minutes allows the starches to fully hydrate, ensuring your sauce is thick and luxurious rather than runny.
The Masterclass:
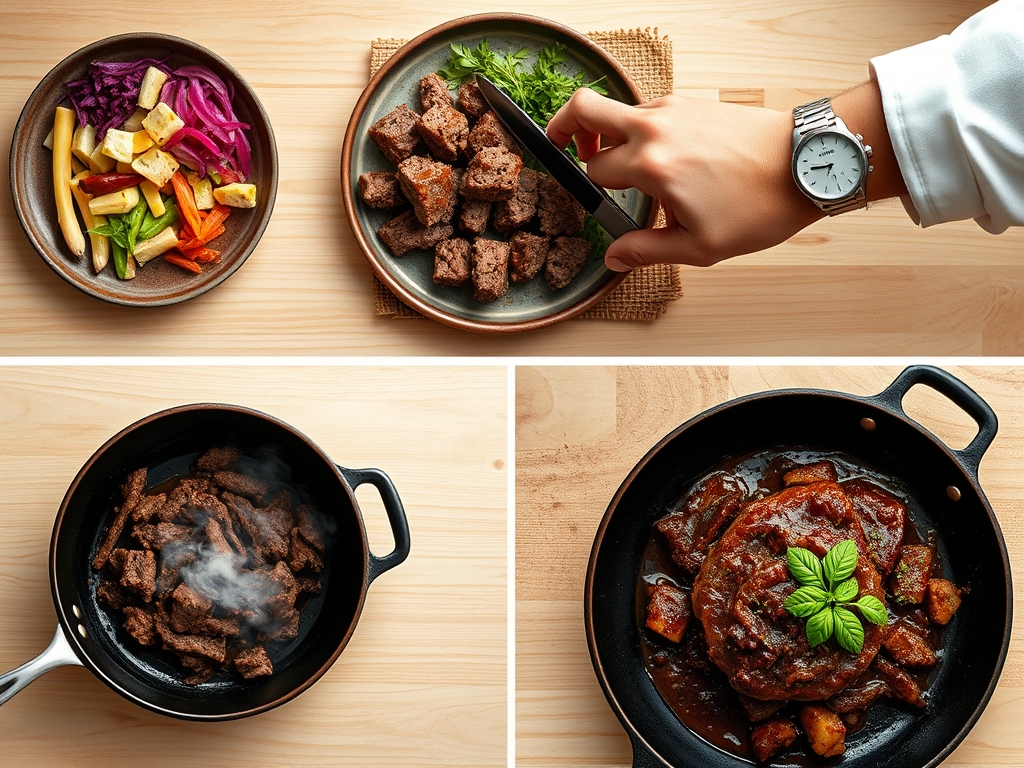
1. The Maillard Sear
Place your dutch oven over medium-high heat. Add a tablespoon of high-smoke-point oil. Once shimmering, add the beef in chunks. Do not crowd the pot. Use a heavy-bottomed skillet or your dutch oven to press the meat down, creating maximum contact.
Pro Tip: This stage relies on the Maillard Reaction. This chemical reaction between amino acids and reducing sugars creates those brown, savory crusts. If you stir too much, you create steam instead of a sear, resulting in gray, boiled meat.
2. Deglazing the Fond
Once the meat is browned and removed, you will see brown bits stuck to the bottom. This is "fond," and it is concentrated flavor. Pour in your wine or stock and use a wooden spoon to scrape it up.
Pro Tip: This is a process of solubility. The alcohol and water in the liquid dissolve the caramelized proteins, integrating them back into the base of your sauce for a more complex profile.
3. Sweating the Aromatics
Add your mirepoix (onions, carrots, celery) to the pot. Cook until the onions are translucent and the carrots have softened slightly.
Pro Tip: Use a pinch of salt here to draw out moisture through osmosis. This prevents the vegetables from browning too quickly and allows them to soften in their own juices.
4. Building the Emulsion
Return the beef to the pot and sprinkle with a bit of flour or starch. Stir constantly for two minutes to cook out the raw flour taste. Slowly stream in your remaining liquid while whisking.
Pro Tip: You are creating a stable emulsion. The starch molecules swell and trap the fat droplets, preventing your casserole from having an oily sheen on top.
5. The Low-Temp Simmer
Lower the heat to a whisper. Cover with the heavy lid. This creates a micro-environment where the heat circulates perfectly.
Pro Tip: Maintaining a low temperature prevents protein denaturation from happening too quickly. If you boil the beef, the muscle fibers tighten and become tough; a gentle simmer keeps them tender.
The Deep Dive:
When we look at the macro nutrition of these hearty bakes, we are looking at a powerhouse of protein and iron. A standard serving provides roughly 35g of protein, 20g of healthy fats, and 30g of complex carbohydrates if you include potatoes or pasta.
Dietary Swaps: For a Keto version, replace potatoes with cauliflower florets and use heavy cream instead of flour to thicken. For Gluten-Free needs, a cornstarch slurry or arrowroot powder works perfectly as a thickener. For a Vegan approach, use "beefless" crumbles and mushroom broth to maintain that savory "fifth taste."
The Fix-It:
- Too Salty? Add a peeled, halved potato. It acts as a sponge for excess sodium.
- Too Thin? Simmer with the lid off for 10 minutes to evaporate excess water and concentrate the sugars.
- Bland Flavor? Add a "bright" finisher like lemon juice or a dash of hot sauce. Acidity acts as a volume knob for salt and savory notes.
Meal Prep Science: These casseroles actually taste better on day two. This is because of aroma redistribution. As the dish cools, the volatile flavor compounds settle into the fats and starches. When reheating, use a low power setting on the microwave or a low oven to avoid "breaking" the emulsion and making the sauce grainy.
The Wrap-Up:
You are now officially the master of the dutch oven. By understanding the science of the sear and the patience of the simmer, you have transformed basic ground beef into a culinary event. These recipes are your reliable companions for chilly evenings and busy weeknights alike. Go forth, grab your favorite tongs, and start creating something magnificent. Your kitchen is your playground; make it smell legendary.
The Kitchen Table:
Can I use frozen ground beef for these recipes?
Yes, but you must thaw it completely in the refrigerator first. Excess moisture from frozen meat prevents the Maillard reaction, leading to steamed meat rather than a flavorful sear. Always pat the meat dry with paper towels before cooking.
Why is my casserole sauce always so runny?
This usually happens if you do not allow the starch to fully gelatinize. Ensure the sauce reaches a simmer for at least five minutes. Also, let the dish rest for ten minutes after cooking to allow the liquids to set.
What is the best way to clean my dutch oven?
Avoid harsh detergents if possible. Use warm water and a soft brush. For stubborn burnt bits, simmer a mixture of water and baking soda for ten minutes; this breaks the molecular bonds of the carbonized food without damaging the enamel.
Can I cook these recipes in a slow cooker instead?
You can, but you will lose the depth of flavor from the stovetop sear. If using a slow cooker, always brown the beef and aromatics in a heavy-bottomed skillet first to develop those essential caramelized flavor compounds before transferring.