

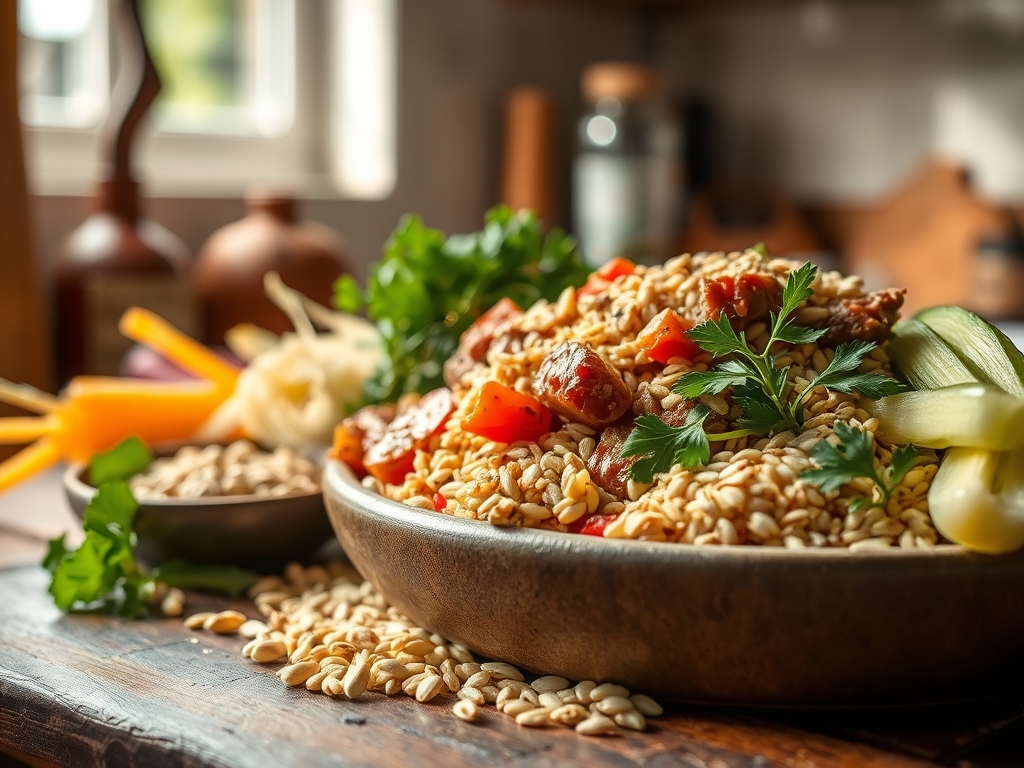
Steam rises from the heavy bottomed skillet in thick, fragrant plumes, carrying the nostalgic scent of toasted vermicelli and concentrated umami. We have all been there; it is six in the evening, the fridge is looking sparse, and you need a win that tastes like a five star bistro. Elevating rice a roni beef recipes is not just about convenience; it is a masterclass in texture and flavor layering. By treating that little gold box as a canvas rather than a constraint, we can transform humble pantry staples into a sophisticated meal. We are moving beyond the basic instructions to embrace culinary techniques like deglazing and fat rendering. The goal is a dish that feels intentional, where every grain of rice is coated in a glossy, savory sheen. Whether you are craving a hearty skillet bake or a refined beef and broccoli fusion, these upgrades rely on the science of heat and the art of seasoning. Let us turn that box into a gourmet foundation that will fool even the most discerning palate.
The Gathers:
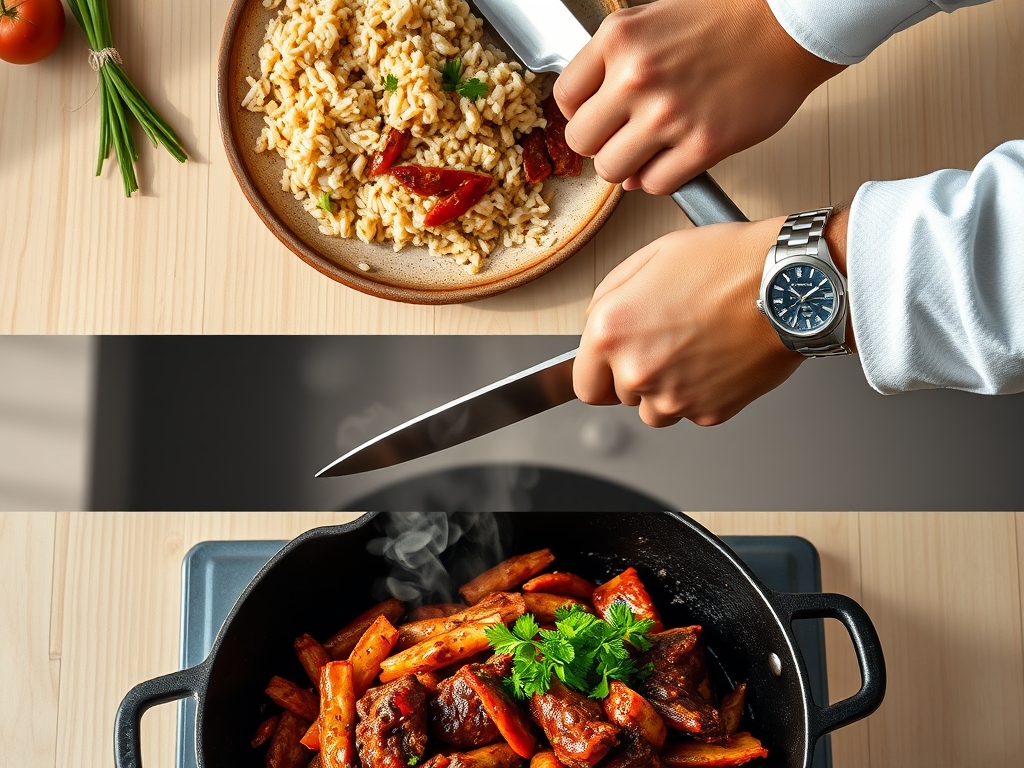
To achieve a professional result, your mise en place must be precise. Start with your base: the Rice-A-Roni beef box. However, we are supplementing the dehydrated seasonings with fresh aromatics to create a multidimensional profile. You will need one pound of 85/15 ground chuck; the fat content is vital for a viscous mouthfeel and to properly toast the pasta. Gather a bunch of scallions, three cloves of garlic, and a knob of fresh ginger. Use a microplane to grate the ginger and garlic into a fine paste; this increases surface area for maximum flavor infusion without the risk of biting into a raw chunk.
For the liquid component, swap the standard tap water for a low sodium bone broth. This adds gelatin, which provides a luxurious body to the sauce. You will also need a tablespoon of high quality soy sauce for a piquant saltiness and a splash of Worcestershire sauce to deepen the fermented notes. If you want to lean into the "smart substitutions," replace the butter with tallow or ghee. These fats have higher smoke points and offer a richer, more animalistic depth that complements the beef flavor. Finally, keep a bench scraper handy to tidy your workstation and move your chopped aromatics from the board to the pan with surgical precision.
The Clock: 15 Minutes Prep, 25 Minutes Cook
The "Chef's Flow" is all about overlapping tasks to minimize downtime. While your heavy bottomed skillet preheats over medium high heat, use those five minutes to mince your vegetables. The actual cooking process is a linear progression: browning, toasting, simmering, and resting. Do not rush the browning phase. Total active time is minimal, but the passive simmering period is where the starch molecules hydrate and the flavors marry. If you are organized, you can have the table set and a side salad tossed before the timer even beeps.
The Masterclass:
1. The Maillard Browning
Place your ground beef in the hot skillet. Use a wooden spoon or tongs to break it into large chunks, then leave it alone. We want to achieve the Maillard reaction, a chemical reaction between amino acids and reducing sugars that gives browned food its distinctive flavor. Once a deep brown crust forms, break the meat into smaller crumbles.
Pro Tip: Avoid overcrowding the pan. If the meat releases too much moisture, it will steam rather than sear, resulting in a gray texture and a loss of complex flavor compounds.
2. Rendering and Toasting
Push the meat to the perimeter and add the rice and vermicelli mix to the center. The residual beef fat will render further, coating each grain. Stir constantly until the pasta turns a golden tan and smells nutty. This toasting step limits starch release, ensuring the final dish is fluffy rather than gummy.
Pro Tip: Toasting the rice creates a protective layer of dextrin. This prevents the grains from absorbing water too quickly, maintaining an "al dente" structural integrity.
3. Deglazing the Foundation
Pour in a splash of dry sherry or a bit of your broth to deglaze the pan. Use your spoon to scrape up the "fond," those delicious brown bits stuck to the bottom. These bits are concentrated flavor gold. Add your garlic and ginger paste now, stirring for only thirty seconds to prevent burning.
Pro Tip: Aromatics like garlic contain volatile oils that degrade under prolonged high heat. Adding them right before the liquid ensures they infuse the dish without becoming bitter.
4. The Controlled Simmer
Incorporate the seasoning packet and the remaining broth. Bring the mixture to a rapid boil, then immediately drop the heat to low and cover with a tight fitting lid. The goal is a gentle simmer that allows the rice to absorb the liquid evenly through steam.
Pro Tip: Do not lift the lid. Opening the skillet releases the built up steam pressure, which fluctuates the internal temperature and leads to unevenly cooked rice.
5. The Aeration and Rest
Once the liquid is absorbed, remove the skillet from the heat but keep the lid on for five minutes. Afterward, use a fork to aerate the rice. This gentle tossing separates the grains and allows excess steam to escape, preventing the rice from overcooking via thermal carryover.
Pro Tip: Resting allows the starches to firm up slightly. If you serve it immediately, the texture may feel overly soft or wet; resting provides that perfect pilaf finish.
The Deep Dive:
From a nutritional perspective, this dish is a powerhouse of protein and complex carbohydrates. One serving provides roughly 25 grams of protein and 35 grams of carbohydrates. To optimize the macros, you can use 93/7 lean beef, though you may need to add a teaspoon of olive oil to prevent sticking.
Dietary Swaps: For a gluten free version, you must swap the Rice-A-Roni for a certified GF rice blend and use tamari instead of soy sauce. For a vegan "beef" version, use crumbles made from soy or pea protein and substitute the beef broth with a rich mushroom stock to maintain that earthy umami.
The Fix-It:
- Crunchy Rice: This happens if the heat was too high and the liquid evaporated too fast. Fix: Add two tablespoons of hot broth, cover, and let it sit on low for three more minutes.
- Salty Overload: If the seasoning packet feels too aggressive, stir in a teaspoon of rice vinegar or a squeeze of lime. The acidity balances the sodium.
- Gummy Texture: You likely skipped the toasting phase or stirred too much during the simmer. Fix: Spread the rice on a sheet pan and pop it under the broiler for two minutes to crisp the surface.
Meal Prep: When reheating, add a tablespoon of water per serving before microwaving. This creates a mini steam chamber that restores the moisture balance. For "day-one" quality, reheat in a small saucier over low heat with a pat of butter to re-emulsify the sauce.
The Wrap-Up:
Mastering rice a roni beef recipes is about respecting the chemistry of the kitchen. By focusing on the Maillard reaction, proper toasting, and the patience of a good rest, you turn a box of dry goods into a culinary triumph. It is smart, it is efficient, and most importantly, it is absolutely delicious. Now, grab your favorite skillet and go show that pantry who is boss!
The Kitchen Table:
How do I make Rice-A-Roni beef more filling?
Add a cup of sautéed mushrooms or bell peppers during the browning phase. The added fiber and volume increase satiety without significantly altering the flavor profile. You can also stir in a handful of fresh baby spinach at the very end.
Can I use a different meat for these recipes?
Absolutely. Ground turkey or lamb works beautifully. If using turkey, add a teaspoon of smoked paprika to mimic the richness of beef. Lamb offers a more robust, gamey flavor that pairs exceptionally well with the toasted vermicelli base.
What is the best way to store leftovers?
Place the cooled rice in an airtight glass container. It will stay fresh in the refrigerator for up to four days. Avoid plastic containers if possible, as rice tends to absorb odors from the environment over time.
Why is my rice always mushy?
Mushy rice usually results from too much liquid or excessive stirring. Ensure you measure your broth with a digital scale for accuracy and resist the urge to stir the pot once the lid goes on during the simmering stage.