
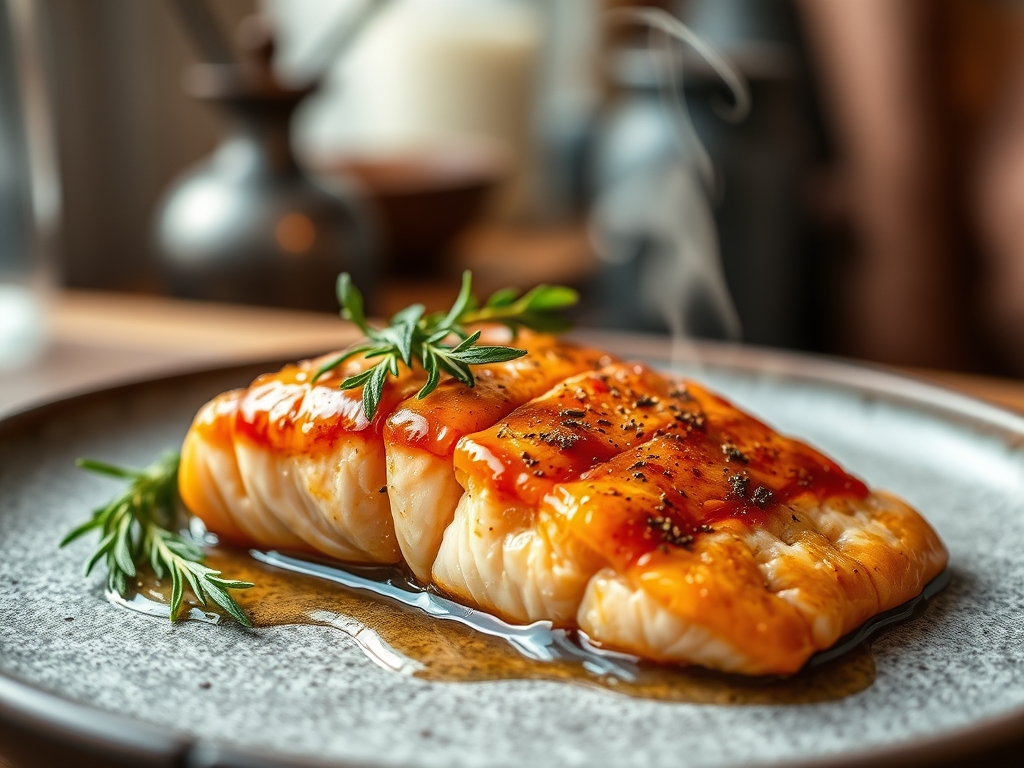
Imagine a kitchen filled with the scent of caramelizing sugars and the sharp, bright zing of fresh citrus. We are hunting for that elusive, restaurant-quality crust that shatters under a fork to reveal buttery, translucent flakes. When you master honey glazed salmon recipes baked to perfection, you are essentially conducting a symphony of heat and chemistry. Most home cooks settle for dry, chalky fillets, but you are not most cooks. We are aiming for a glaze so viscous it clings like liquid gold and a texture that melts the moment it hits your tongue. This is not just a Tuesday night dinner; it is a masterclass in balancing high-fructose sweetness with the savory depth of amino acids. By the time we are finished, you will understand exactly how to manipulate moisture and temperature to achieve a finish that looks like it was painted by a professional food stylist. Let us grab our aprons and dive into the molecular magic that turns a simple piece of fish into a masterpiece.
The Gathers:
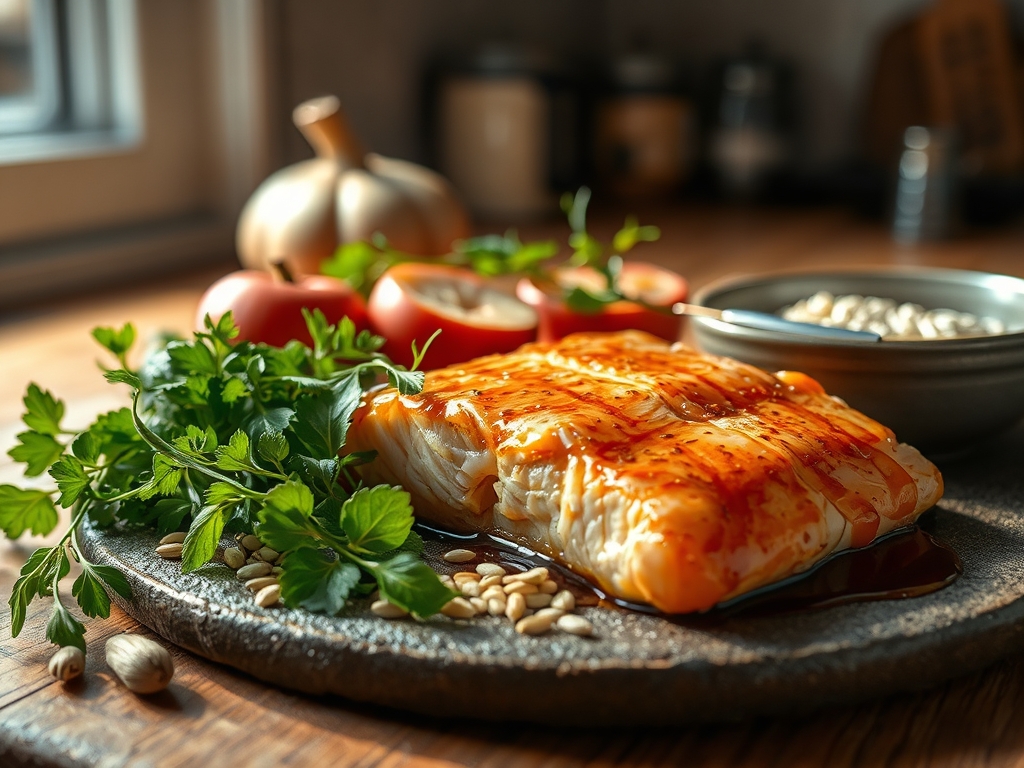
Before we apply heat, we must assemble our mise-en-place with surgical precision. Start with high-quality Atlantic or King salmon fillets; look for deep pigmentation and firm muscle fibers that spring back when pressed. For the glaze, you will need raw wildflower honey for its complex floral notes and high sugar content, which is essential for the Maillard reaction. Use a microplane to zest fresh lemons, releasing the volatile oils trapped in the flavedo without hitting the bitter white pith. You will also need low-sodium soy sauce to provide a piquant umami base, freshly grated ginger for a spicy aromatic kick, and cloves of garlic crushed with a bench scraper to release their sulfurous compounds.
Smart Substitutions:
If you are looking for a deeper, earthier sweetness, swap the honey for dark maple syrup. For those avoiding soy, coconut aminos offer a similar salty profile with a lower glycemic index. If fresh ginger is unavailable, a pinch of ground ginger works, though you will lose the bright, fibrous texture that fresh aromatics provide. Always ensure your fats, like unsalted butter or avocado oil, are at room temperature to facilitate better emulsification when whisking your glaze in a saucier.
The Clock
Efficiency in the kitchen is all about "Chef's Flow." Total active preparation time is approximately 10 minutes, while the baking process takes between 12 and 15 minutes depending on the thickness of your fillets. However, the secret to success is the 5-minute rest period post-bake. This allows the proteins to relax and reabsorb juices.
Chef's Flow: Start by preheating your oven to 400 degrees Fahrenheit. While the oven reaches temperature, prepare your glaze. This ensures that the honey has time to infuse with the aromatics. By the time your salmon is seasoned and placed on the tray, the oven is a consistent heat box, preventing the temperature drops that lead to uneven cooking.
The Masterclass
1. Tempering the Protein
Remove your salmon from the refrigerator at least 15 minutes before cooking. Pat the skin and flesh bone-dry with paper towels to remove surface moisture.
Pro Tip: This prevents the fish from steaming in its own juices. Removing surface moisture allows the heat to immediately begin the Maillard reaction, creating a savory crust rather than a rubbery exterior.
2. Emulsifying the Glaze
In a small saucier, whisk together the honey, soy sauce, lemon zest, and aromatics over low heat until the mixture is uniform and slightly reduced.
Pro Tip: Heating the glaze before application encourages enzymatic browning. By reducing the water content in the honey, you increase the sugar concentration, which leads to a faster, more even caramelization in the oven.
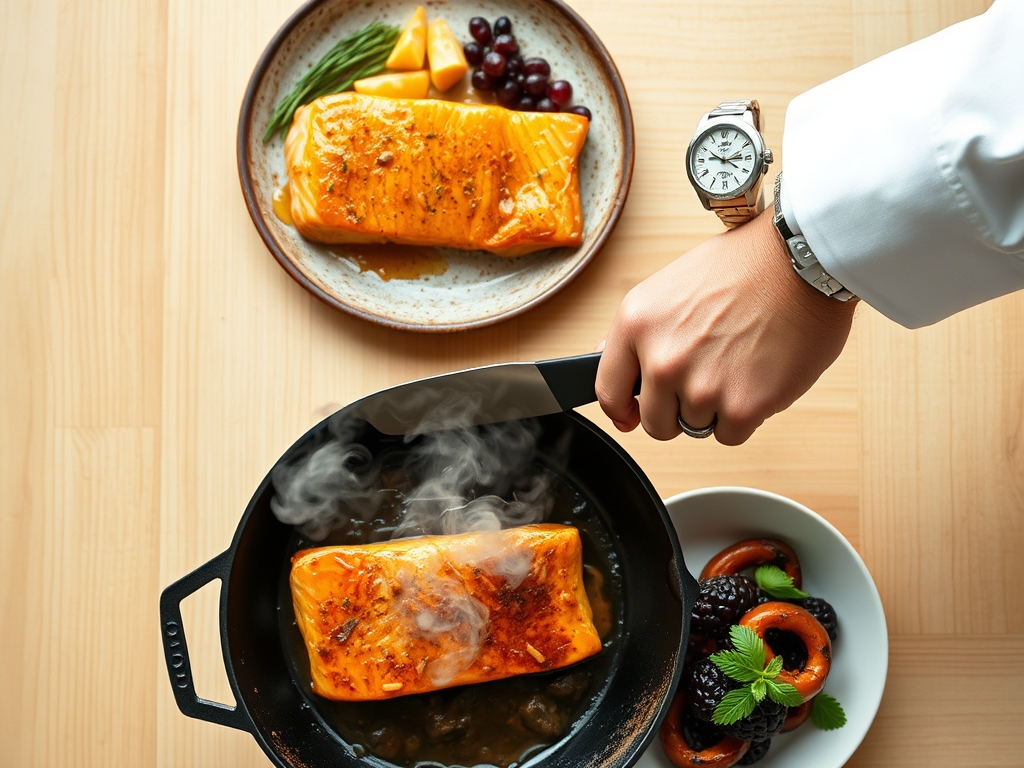
3. The Initial Sear
Place the salmon skin-side down on a parchment-lined baking sheet or in a heavy-bottomed skillet. Brush a thin layer of the glaze over the top.
Pro Tip: The parchment paper acts as a thermal barrier, preventing the delicate skin from sticking or scorching before the internal proteins reach the desired temperature.
4. Precision Baking
Slide the tray into the center rack of the oven. Bake until the internal temperature reaches 125 degrees Fahrenheit when checked with a digital thermometer.
Pro Tip: We pull the fish early to account for thermal carryover. The internal temperature will continue to rise by 5 to 7 degrees after removal from the oven, landing perfectly at the chef-recommended 130 to 135 degrees.
5. The Broil Finish
Switch the oven to the broil setting for the final 2 minutes. Apply a second, thicker coat of glaze using a silicone pastry brush.
Pro Tip: This intense overhead heat triggers rapid caramelization. The sugars in the honey undergo pyrolysis, creating complex new flavor compounds and a glossy, lacquered finish.
6. The Resting Phase
Transfer the fillets to a warm plate using tongs or a wide fish spatula. Let them sit undisturbed for 5 minutes.
Pro Tip: Resting allows the muscle fibers, which tightened during cooking, to loosen. This redistributes the moisture, ensuring every bite is succulent rather than dry.
7. The Acidic Brightening
Finish the dish with a final squeeze of fresh lemon juice and a sprinkle of flaky sea salt.
Pro Tip: The citric acid cuts through the heavy lipids of the salmon and the intense sweetness of the honey. This balances the palate and enhances the perceived flavors of the aromatics.
The Deep Dive
From a nutritional standpoint, this dish is a powerhouse. A standard 6-ounce serving provides roughly 34 grams of high-quality protein and is rich in Omega-3 fatty acids, which support heart and brain health. The honey provides a quick source of glucose, while the salmon provides sustained satiety through healthy fats.
Dietary Swaps:
For a Vegan alternative, use this exact glaze on thick slabs of roasted cauliflower or firm tofu. For Keto followers, replace the honey with a monk fruit-based syrup to keep the net carbs near zero. Gluten-Free diners should simply ensure they use Tamari instead of traditional soy sauce.
The Fix-It:
- White Stuff Appearing: This is albumin, a protein that squeezes out when salmon is cooked too fast or too long. Fix: Lower your oven temp and pull the fish sooner.
- Burnt Glaze: If the honey smells acrid, the sugar has scorched. Fix: Tent the fish with foil if the glaze browns too quickly.
- Soggy Skin: This happens when moisture is trapped. Fix: Ensure the skin is bone-dry and use a wire rack over your baking sheet to allow air circulation.
Meal Prep & Reheating:
To maintain "day-one" quality, do not microwave your leftovers. The high-intensity waves will turn the fats rancid and the texture rubbery. Instead, reheat in a 275-degree oven with a splash of water and a cover, or flake the cold salmon into a salad for a chilled protein boost.
The Wrap-Up
You now hold the keys to the kingdom of honey glazed salmon recipes baked with scientific precision! By understanding how honey behaves under heat and why resting your fish is non-negotiable, you have elevated a simple dinner into a culinary event. Go forth, use your microplane with confidence, and enjoy the beautiful, glossy results of your hard work. Your kitchen is now a laboratory of flavor!
The Kitchen Table
How do I know when the salmon is done without a thermometer?
Press the top of the fillet gently with a fork or finger. If the flakes begin to separate easily along the white lines of fat (lamellae) and the center looks slightly translucent, it is perfectly cooked.
Can I marinate the salmon in the honey glaze overnight?
Avoid long marination. The salt in the soy sauce can begin to cure the fish, changing its texture from flaky to ham-like. A 20-minute soak at room temperature is sufficient for deep flavor infusion.
Why is my honey glaze too thin and runny?
You likely did not reduce the glaze enough or your salmon released too much moisture. Ensure you pat the fish dry and simmer the glaze in a saucier until it coats the back of a spoon before brushing.
Should I leave the skin on when baking?
Yes! The skin acts as an insulator, protecting the delicate flesh from the direct heat of the pan. Even if you do not plan to eat it, the skin helps retain moisture during the baking process.