
The scent of toasted cumin and rendered fat hitting a blistering skillet is a universal love language. When life gets chaotic, finding easy mexican ground beef recipes that actually deliver restaurant-quality depth is the ultimate culinary flex. We are moving past the days of watery, grey crumbles and dusty seasoning packets. Instead, we are focusing on the molecular magic of the Maillard reaction and the art of the emulsion to transform basic protein into a piquant masterpiece. Grab your favorite heavy-bottomed skillet; we are about to rewrite your weeknight rotation with professional precision and a little bit of sass.
The Gathers:
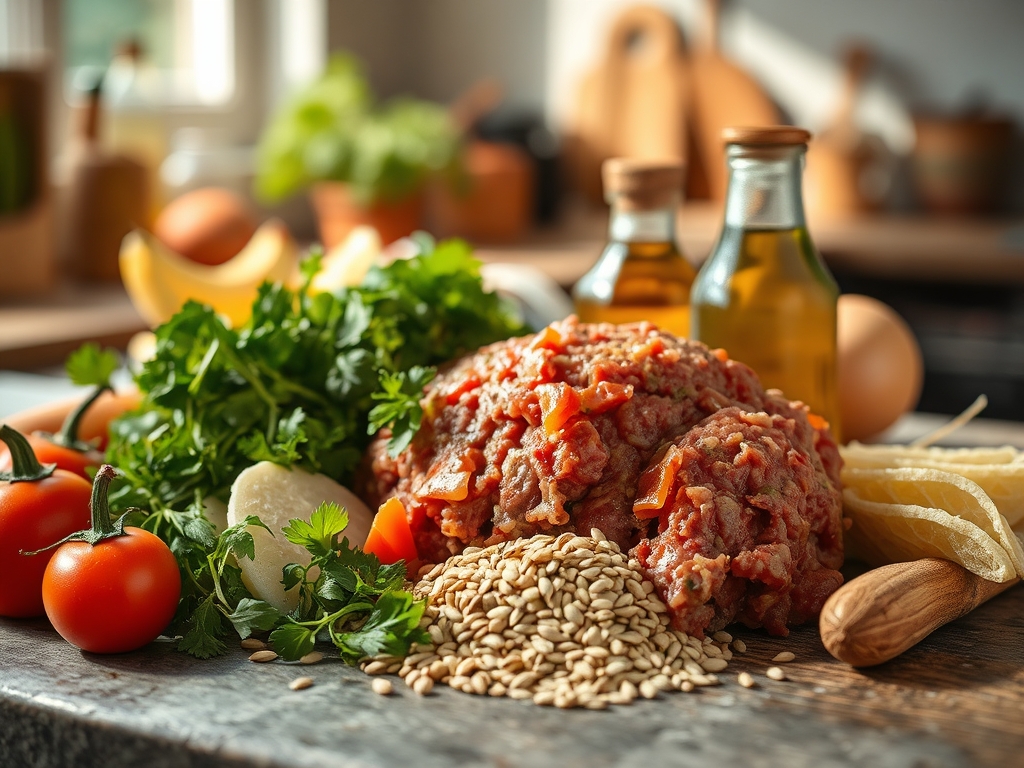
To achieve elite results, your mise-en-place must be intentional. We start with high-quality ground beef, ideally an 80/20 blend. This ratio is critical because the fat acts as a flavor carrier for fat-soluble compounds in your spices. You will need a microplane for fresh garlic and zest; this creates a fine paste that integrates into the sauce rather than burning in chunks.
Our flavor profile relies on a trifecta of dried chilies (ancho for sweetness, guajillo for earthiness, and arbol for heat). If you are using a pre-mixed rub, ensure it is salt-free so you can control the sodium levels independently using a digital scale. For the liquid element, a high-quality beef bone broth provides a gelatinous mouthfeel that water simply cannot replicate.
Smart Substitutions:
If you are looking to lighten the profile, ground turkey or bison works beautifully, but you must add a teaspoon of neutral oil to mimic the missing lipids. For a plant-based pivot, lentils or walnut meat can be used, though you will need to increase the acid (lime juice or apple cider vinegar) to brighten the heavier earthy tones. Always have a bench scraper handy to move your chopped aromatics from the board to the pan without losing a single drop of precious juice.
The Clock:
In the world of professional cooking, we call this the "Chef's Flow." Total active time for these hacks is roughly 15 minutes, with a 20-minute simmer to allow the flavors to infuse and the collagen to break down.
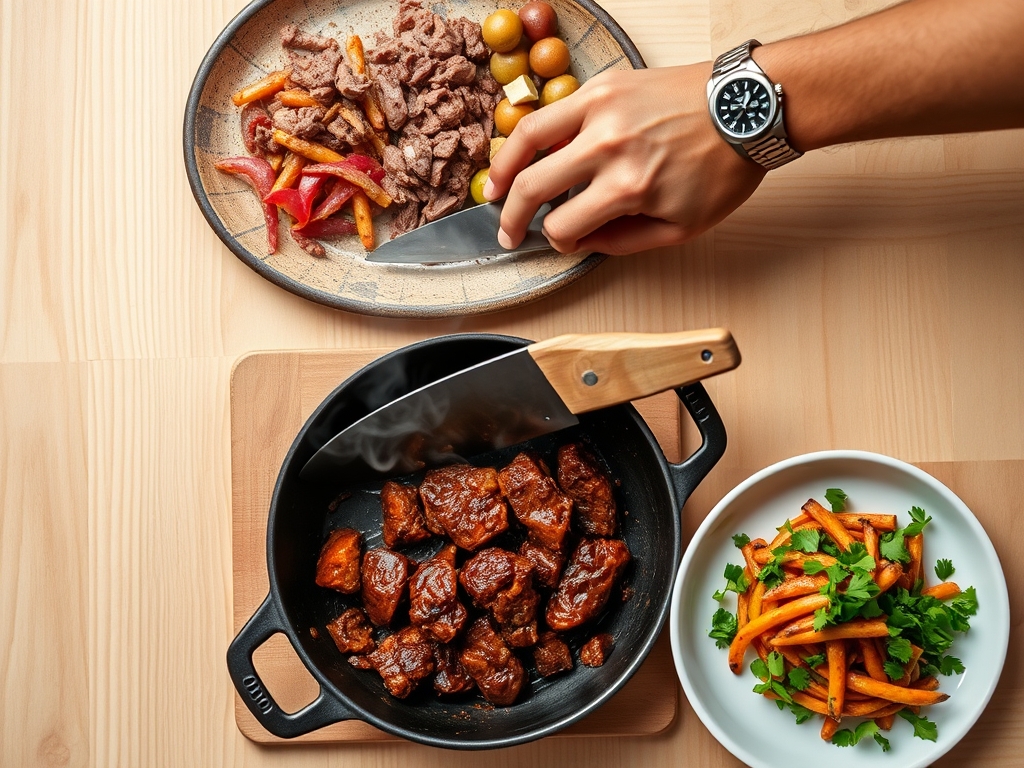
- Prep (5 Minutes): This is your rapid-fire chopping and measuring phase. Use a sharp chef's knife to ensure clean cells in your onions; dull blades crush cells and release bitter sulfur compounds.
- The Sear (7 Minutes): This is the most active phase where you manage heat levels to prevent scorching while maximizing browning.
- The Simmer (10-15 Minutes): This is passive time. Use this to prep your garnishes or aerate your rice.
The goal is a 30-minute total window. By the time the table is set, the beef has reached its peak viscous consistency.
The Masterclass:
1. The Cold Pan Start Myth
Contrary to popular belief, you should never put cold beef into a cold pan. Preheat your heavy-bottomed skillet until a drop of water dances on the surface. This creates an immediate sear, preventing the meat from "steaming" in its own juices.
Pro Tip: This technique utilizes the Leidenfrost effect. By ensuring the pan is hot enough, you create a microscopic layer of vapor that prevents sticking and initiates the Maillard reaction immediately for a savory crust.
2. The Baking Soda Secret
Before the meat hits the heat, toss it with a pinch of baking soda and a splash of water. Let it sit for 15 minutes. This raises the pH of the meat, making it harder for the proteins to bond tightly and squeeze out moisture.
Pro Tip: This is a form of chemical tenderization. It prevents the beef from becoming "rubbery" and ensures every morsel remains succulent even after a long simmer.
3. Blooming the Spices
Never throw your spices into the liquid. Instead, push the browned meat to the sides of the pan and drop your spices directly into the rendered fat in the center. Toast them for 60 seconds until fragrant.
Pro Tip: Many flavor compounds in cumin and chili powder are lipid-soluble. Toasting them in fat "unlocks" these volatile oils, resulting in a much more aggressive and complex flavor profile.
4. The Deglaze and Scrape
Once your spices are toasted, the bottom of your pan will be covered in dark, flavorful bits called fond. Pour in a splash of beef broth or beer and use a wooden spoon or tongs with a paper towel to scrape every bit of it up.
Pro Tip: This process is called deglazing. Those browned bits are concentrated umami; incorporating them back into the sauce is the difference between a flat dish and a professional one.
5. The Emulsion Finish
In the final two minutes of cooking, whisk in a small knob of cold butter or a tablespoon of heavy cream. Stir vigorously to combine the fats with the beef juices.
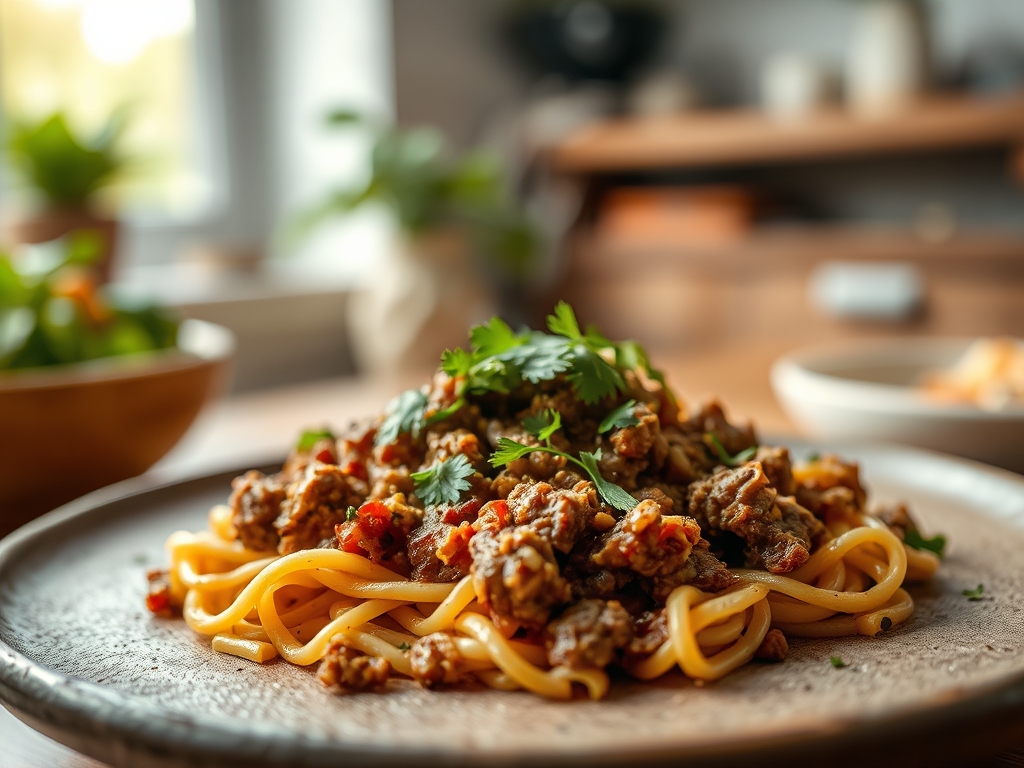
Pro Tip: You are creating a stable emulsion. This coats the meat in a glossy, velvet-like sauce that clings to the beef rather than puddling at the bottom of your taco shell.
6. The Carryover Rest
Turn off the heat when the sauce is slightly thinner than you want. Move the skillet to a cool burner and let it sit for five minutes before serving.
Pro Tip: This accounts for thermal carryover. The residual heat will continue to reduce the sauce, and the muscle fibers will relax, reabsorbing some of the moisture they lost during the high-heat sear.
The Deep Dive:
Macro Nutrition:
A standard serving of this Mexican ground beef (using 80/20 beef) provides approximately 22g of protein, 14g of fat, and 3g of carbohydrates. To optimize this for fitness goals, use a saucier to drain excess fat halfway through the browning process before adding your aromatics.
Dietary Swaps:
For Keto enthusiasts, serve this over roasted cauliflower or in lettuce wraps to keep the glycemic index low. For Gluten-Free requirements, ensure your beef broth is certified, as some brands use barley-based thickeners.
The Fix-It:
- Too Salty? Add a peeled, halved potato to the simmer; it acts as a sponge for excess sodium.
- Too Greasy? Use a folded paper towel held by tongs to blot the surface of the pan.
- Too Bland? Add a teaspoon of cocoa powder or a squeeze of fresh lime juice to provide a bitter or acidic counterpoint to the fat.
Meal Prep Science:
When reheating, the "warmed-over flavor" is caused by lipid oxidation. To prevent this, store the beef in an airtight glass container with as little headspace as possible. Reheat in a skillet with a tablespoon of water to re-steam the proteins rather than using a microwave, which can make the fat turn rancid and the texture gritty.
The Wrap-Up:
Mastering easy mexican ground beef recipes is about more than just following a list of ingredients; it is about understanding how heat and chemistry interact in your kitchen. By focusing on the sear, blooming your spices in rendered fat, and respecting the power of a good emulsion, you elevate a humble pound of beef into something truly spectacular. Whether you are hosting a frantic Tuesday night dinner or meal-prepping for a high-performance week, these six hacks ensure your results are consistently bold, piquant, and utterly delicious.
The Kitchen Table:
How do I prevent my ground beef from being grey?
Ensure your pan is screaming hot before adding the meat. Do not overcrowd the skillet; if you cook too much at once, the temperature drops and the meat steams in its own moisture instead of searing.
Can I freeze this cooked Mexican beef?
Yes. Allow it to cool completely to prevent ice crystal formation. Store in a vacuum-sealed bag for up to three months. Reheat slowly in a saucier with a splash of broth to restore the original texture.
What is the best way to drain the fat?
Use a bench scraper to push the meat to one side, tilt the pan, and use a spoon or bulb baster to remove the liquid. Never pour grease down the drain; it will solidify and cause plumbing issues.
Why is my taco meat always dry?
You likely overcooked it or skipped the "baking soda" hack. Adding a starch-based thickener or a splash of gelatin-rich bone broth at the end of the cooking process will create a moist, succulent mouthfeel.